--------------------------------------------------------------------------------------------------------------------------
For Auto-Login
전원만 켜면 자동으로 로그인이 되도록 하였다.
먼저 설정에 가서 User and Group 에서 Password : not asked on login 으로 설정 변경
in a console>>
sudo vim /usr/share/lightdm/lightdm.conf.d/60-lightdm-gtk-greeter.conf
[SeatDefaults]
greeter-session=lightdm-gtk-greeter
autologin-user=gdrone <--add the line
--------------------------------------------------------------------------------------------------------------------------
DroneKit
-Install
sudo pip install Dronekit
--------------------------------------------------------------------------------------------------------------------------
-Setting
def connect
connection string option for raspberry pi GPIO
| Linux computer connected to the vehicle via Serial port (RaspberryPi example) | /dev/ttyAMA0 (also set baud=57600) |
--------------------------------------------------------------------------------------------------------------------------
-Trouble Issue
>>from Dronekit import connect
connect(connect_string,flag) -> 이게 연결 안됨.
dev/ttyAMA0 로 연결 해서
--baudrate 57600 값도 넣어야 하는 데 어떻게 넣는 거지?
def connect :
-Trouble issue_2
>>> Exception in message handler for HEARTBEAT
>>> mode 196608 not available on mavlink definition
--------------------------------------------------------------------------------------------------------------------------
MAVProxy
-Install
pip install MAVProxy
--------------------------------------------------------------------------------------------------------------------------
-Connect
--------------------------------------------------------------------------------------------------------------------------
-Setting
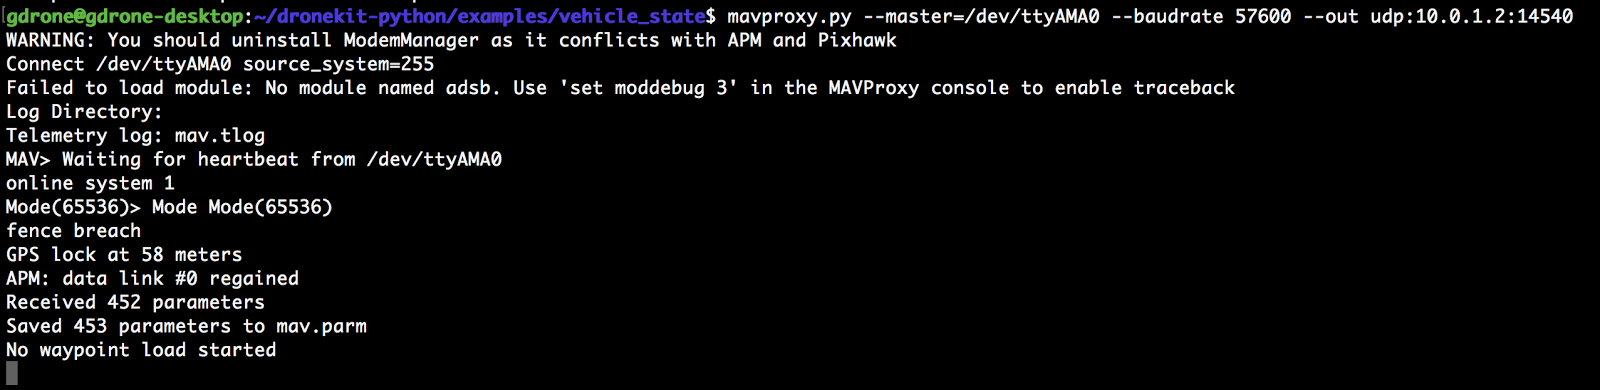
-Image
->RaspberryPi
mavproxy.py --master=/dev/ttyAMA0 --baudrate 57600 --out udp:10.0.1.2:14540
baudrate 는 아직 모르겠고 // gpio 핀을 이용하였으므로 /dev/ttyAMA0 라는 디바이스 할당에 out_UDP 는 내 컴퓨터가 할당 받은 IP를 적어서 넘겨주게 만들었다.
->MyCom
Listenning Port 는 위와 통일 되게 같은 포트 번호를 입력한다. ex) 14540
Target Hosts 는 라즈베리파이 가 할당 받은 ip 만 입력 하면 된다. ex)10.0.1.16
--------------------------------------------------------------------------------------------------------------------------
Baud Rate
보 레이트 (Baud Rate) 는 초당 얼마나 많은 심볼(Symbol, 의미 있는 데이터 묶음) 을 전송할 수 있는가를 나타내는 말이다. 이는 이론적인 통신 단위로 초당 신호(Signal) 요소의 수를 나타낸다.
만약 하나의 신호요소가 2비트로 구성되어 있는 경우라면 보는 BPS 의 반이 된다. 즉, 1보 동안 2비트가 전송된다. 일반적으로 신호를 1비트로 여긴다면 BPS 와 같은 단위가 된다.
심볼이란 말은 의미 있는 데이터 비트의 묶음이다. 일반적으로 시리얼 통신에서는 데이터 비트가 8-bit 를 사용하므로 이를 하나의 심볼이라고 이야기 할 수 있다.
1개의 symbol (또는 character) 는 8개의 bit 정보와 같다.
예를 들어, 2400 baud rate 를 갖는다는 말은 1초에 2400개의 의미 있는 심볼 즉 캐릭터를 송신할 수 있다는 이야기이다. 1초에 2400개의 ASCII 코드를 전송할 수 있다는 말로 이해할 수 있다.
--------------------------------------------------------------------------------------------------------------------------
Trouble issue
Traceback (most recent call last):
File "basic.py", line 10, in <module>
vehicle=connect(connection_string, wait_ready=True, baud=57600)
File "/usr/local/lib/python2.7/dist-packages/dronekit/__init__.py", line 2827, in connect
vehicle.initialize(rate=rate, heartbeat_timeout=heartbeat_timeout)
File "/usr/local/lib/python2.7/dist-packages/dronekit/__init__.py", line 2100, in initialize
raise APIException('Timeout in initializing connection.')
dronekit.APIException: Timeout in initializing connection.